
WARM WELCOME AND A BIG HUG FROM BUDAPEST!
I’m so happy that you are here and so excited to be with you for the next 3 month. (and longer 🙂 )
Before we start with the ‘flower’ lessons I wrote you about aquarelle and supplies I use and love.
During the months we are going to paint beautiful flowers, sometimes animals. 🙂 mostly with aquarelle and sometimes with acryl.
In this lesson, you can read all about the materials. And what I use.
I suggest you to buy a set of aquarelle paint, if you can afford an artist type, you will use it for years. Aquarelle pans last for long 🙂
The good quality paint and paper and brush makes a big different on the result of the paintings.
In the following lessons I will write you about the plant or flower, I will write something I feel important for your SOUL, there will be inspirational pictures (lot in my pinterest album) beautiful paintings from different artists with different medium to see that the border is the starry sky, some paperwork, and sometimes video about origami, some healthy food and how to use the plants. And at the end there are painting videos. Sometimes one but mostly more, even 5 different approach for the flower.
As bonus I included my older videos as well.
IMPORTANT, sometimes I can’t stop sharing lot of interesting thing concerning our plants or flowers.
MAYBE I’M TOO MUCH for YOU🙂
If you don’t want to read about it and see the inspirational pictures and everything I would like to share below
you can scroll down, you will always find the ‘PAINTING TIME‘ part at the bottom of the page 🙂
But I really believe that it is important to be friend with the object we want to paint or draw. Itherwise there are many interesting thing I collected for you with love.
Please contact me if you have questions or suggestions I’m here for you. Reply you immediately or asap but think of the timezone, maybe I’m sleeping when you paint 🙂 AND sorry for my english I didn’t have anybody to correct me so maybe there are some grammatical mistakes. Hope not too much 🙂
love you all
XXX
BEFORE YOU START YOUR PAINTING
OUTLINES:
The first thing is that you have to make a drawing with light lines.
You can draw it with aqurell pencil similar colour that you use in your painting if you don’t want the graphite lines.
How to make it?
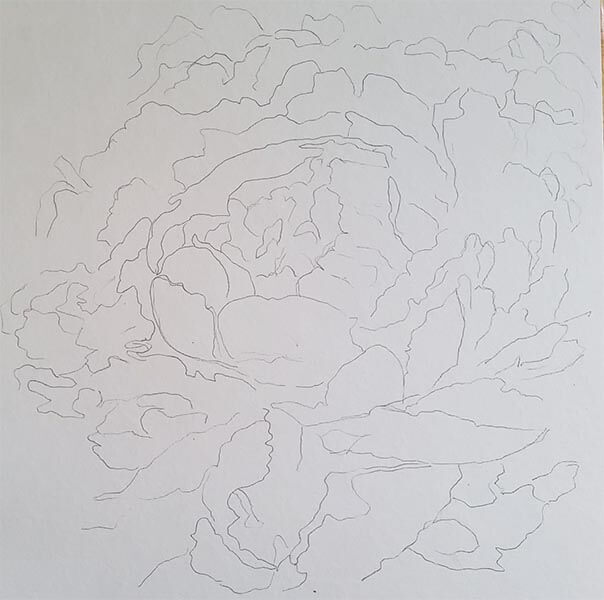
There are 2 ways
 Freehand
You draw with freehand mode See your photo and draw it It is working very well but have to practice a lot!
Any amount of practice is better than less practice. Do what you can, but remember…
The more you practice, that more you improve.
The funny thing is, the more you practice, the more you want to practice.
One of the goal is that drawing becomes a habit.
In freehand mode you also measure. you compare distances by measuring.
Right brain methods
You draw using negativ places,or with shapes or upside down, to calm your left brain.
 with help
Your paper and your photo MUST BE the same propotion -you can reduce or enlarge.
Make grid on the photo and on the paper too and draw what each square contains
HERE is an easy online program for gridmaking
(choose your photo add how many squares you want I added 4×5 for my 18x24cm photo
choose the size and colour of the lines I choosed 1 pixel and white
then download – it will be in your download folder and one important thing –
file name ArtTutor and has no extension – you have to name it to something.jpg
if dot jpg is missing you will not see the griidded photo.)
and if you have a gridded photo just draw each line you see in the little squares.
Your paper and ypur photo MUST BE the same size.
Indigo
Cheat a bit with indigo paper / carbon paper. Put an indigo paper between your aquarelle paper and the reference photo and draw the lines over on the reference photo. When you start cheque if the line is visible to be sure how hard you have to push the pen/pencil. Be careful not move the reference photo.
Graphit
cover the back of the photo or the sample paper with 6-8b pencilmarks and put this reference photo on the aquarelle paper draw the lines
illuminate from the back
You need a glassplate than put your paper on the photo and draw around the lines while putting the light under a glass
or you if are in a dark room when light is outside you can put your paper which is on the photo to the glass of the window
or put your paper on the monitor and draw around the lines (never see this on internet, nobody tell it, but this is a good possibility)
The more accurate you are when you draw, the more preciz and realistic the painting will be.
Don’t worry, all the great masters were using something for their underdrawing.
Did you know that the Ancient Egyptians used the grid system? No one really knows where it all exactly started or where the grid system officially came from but it has been used throughout art history and by many artists including famous ones like Leonardo Da Vinci and Vincent Van Gogh.
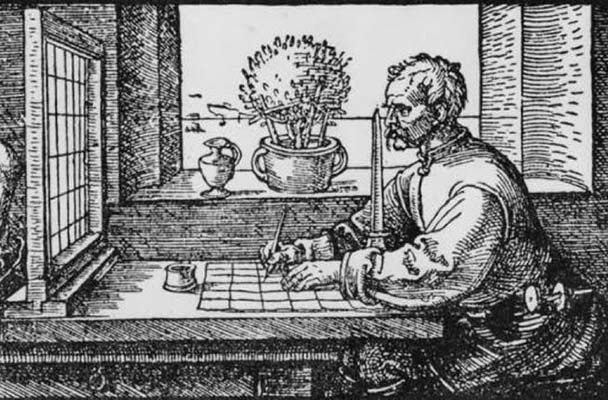
During the Renaissance period (14th to 16th centuries) artists would use the grid technique. One of the most promenade would be Albrecht Durer. Where he used a drawing machine much like the examples below..
I’m so excited that you are here!
Feel free to write if you have any questions or wishes or opinions.
We are not the same and my goal is to help you, I’m grateful for all the feedback!
In this course we are mostly using aquarelle paint.
Why? Because it is beautiful and easy (at first) and need not too much stuff.
And you can stop easily and continue . .
This is a little taste and reply for the questions of ‘What? Why? How?” .

As the famous artists, art historians, senior masters claim, art is based on drawing, we have to start developing it if we want to create paintings and artworks. Of course, everyone see through different eyes. Art is subjective, what we like, what moves us is different. However, if something is sketched out not correctly and shows that it is not a deliberate distortion, everyone will notice the failure without exception.
Even if someone is not a connoisseur, he also feels that something is wrong in the picture, even he may not be able to formulate what it is . 🙂
So it is advisable to get some experience first in drawing, either with traditional drawing techniques, or with today’s fashionable and promising quick results right – brain creativ drawing. This method does not really teach to draw, but teach you to see and simply professional technique.
– No matter which way you go, the point is to get started and most importantly practice.
– I believe everyone is creative! We wouldn’t be able to walk or talk if we had given up when we were little baby after the first failure.
– You have to practice and practice. Lots of exercises and your technical skills will improve. The most important thing is to believe in yourself and not to give up. And the end result is not important, but the way, the process. If you feel the process, you fall in love with the state that creates the creations.
– Never compare yourself to others, but only to yourself.
– It is worth keep the first ‘bad’ paintings and drawings (just for yourself) to look back at how enormous you have evolved.
– There is transformation only if you do it !!!!!!!
– The most important is to enjoy creating!
– Try to find time for your art!
AQUARELLE or watercolour
Watercolor painting or water painting is the most difficult painting technique. Anyone who has tried it already knows that often the result is quite different from what one expected when he planned what he was going to paint. Maybe it seems simple and at first sight easy. No need for complicated equipment, it seems relatively inexpensive – of course, the price of water paints by artist aquarell is very high, but school equipment can also be used for initial training. After all, we learned this at school in our little age :).
We can gain important experience and for the what, why, how by the time we need to find answers to the questions. We want to try out any kind of painting art.
You can try a weaker quality paint but more successful experience to try out if you paint with good quality paint and good paper from the beginning. If you can afford to buy better.
One of the great advantages of paint with watercolor is that there is only a small amount of equipment needed to store it.
Paints and brushes can be used for a long time. Portable. Easy to stop if you have no time 🙂
Easy to wash brushes 🙂 no solvent needed only water.
EQUIPMENT:

Aquarell, or water paints are from cheap schools to very expensive artist paints, pigment content is decisive, I noticed that the more expensive the better the quality (this does not mean that cheap is not usable, but it is easier fade and its color is not strong.) I still have my 40 years old school set and I’m sure that it has big pigment content compared to the nowadays available student sets. 🙂
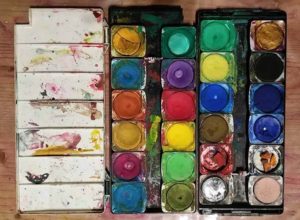
I’ve seen a lot of tests over the years, there are big differences in color mixing, and for example more easier fade, etc.
In principle, there is no white color in the aquarell, because the paper gives the whiteness, but there is also white in the tubes and pans paints, but it only softens and usually does not cover the colors.
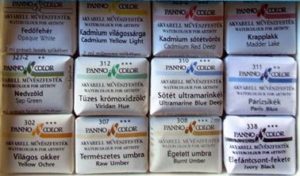
- ‘dry ‘ – button shape or – pan (full pan or half pan, they are little bricks)
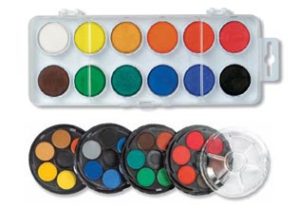
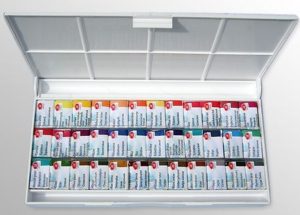
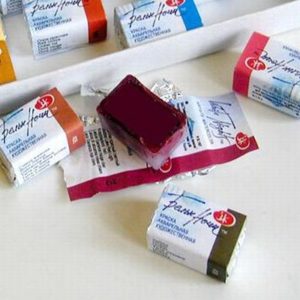
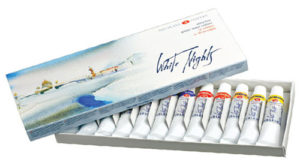
- – tubes –
- liquid ECOLINE

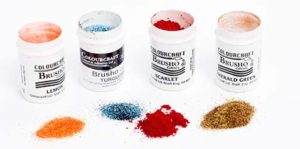
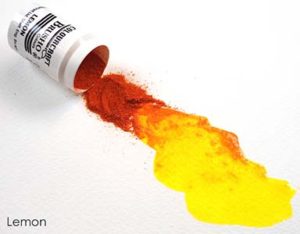
- powder in little jars BRUSHO
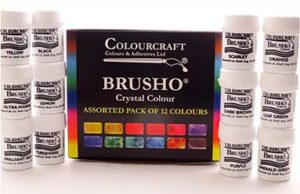
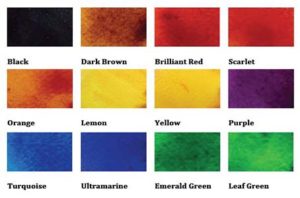
 When you buy an aquarell set I think the first step is to paint your own COLOUR CHART
After you opened the box of your new aquarelle set, cut a piece of paper the same size of your box. Divide it into the same amount as your painit pans and paint your colour into the little bricks. Try to make a shading, start with dark to light of the colour.
It is important because usually you don’t able to decide from the pan what colour it is. Brown or purple ? of course if you paint a lot you will know, but this is a little help at first.
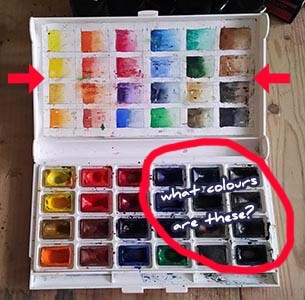
And I suggest to try to mix the colours to see the new colour results. You know when you mix eg. a red and blue you may get a wonderful lila or a dull colour. It depends on what shade is your colour ( 3 main colour make mud and if you mix a yellowish red to a yellowis blue you will get mud insted of brilliant lila colour. so worth a try before you start to use a new set. You don’t want to be dissapointed)
– PLEASE MAKE YOUR COLOUR CHART FOR YOUR PAINT SET AND
– MAKE ANOTHER CHART TO EXPLORE THE MIXTURE OF YOUR PAINTS

Usually we use soft natural hair brushes for water painting. The best quality is made of sable hair, but you can also get brush from squirrel hair and ox hair. The range of artificial brushes offered by the shops is usually made of nylon, and although they do not hold the paint as well as hairbrushes, they are excellent for fine details and are cheaper.
For some techniques, synthetic is even better than natural! Available in a wide range of sizes and shapes from the wide spreading brush through the thin branch paint brush to the fan brush.
Although water painting does not require a lot of brushes, in most cases three or four are enough. For practical reasons, a large flat-end brush is best for painting large surfaces and two or three different size round brushes. I think it’s worth trying a lot to find your favorite.
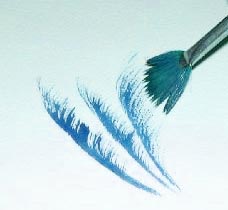
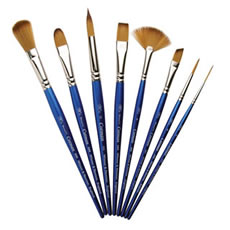
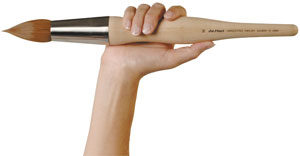
If you want to try “urban sketcher” , you might want to get a little moleskine diary, a tiny paint set, and a brush that has a water tank to simply sketch on the street in town, or in nature.
Pentel Aquash Water Brush Pens
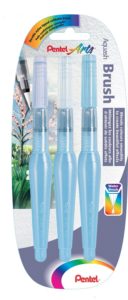
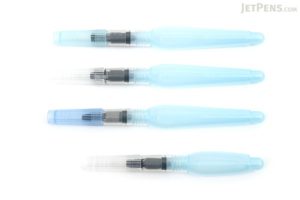
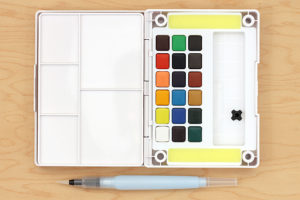

We work with watercolors on paper, preferably as thick as possible, so that our sheets do not warp or curl. The more water we use, the thicker the paper we need.
Papers below 300gr should preferably be stretched into a wood board to avoid warping, waving from many waters. I don’t use thinner than 300 g.
PAPER TYPES FOR AQUARELLE
Hot Press
Cold Press
Rough Press
Available in arch, block, booklet.
There are colored in the arch 🙂

You need more water jar !!!
On the one hand, to wash the brush on the other hand, to dilute the paint.
There are artists who use one jar for the cool colours, one for the warm colours, it makes the same sense to avoid muddy colours.
I think it’s important to always have clean water at hand! Dirty water makes dirty the pure colors, while the goal is to achieve clear colors and You blend with another color. Dirty water makes dirty the pure color.
You can try to draw brush strokes on white paper with dirty water without paint. Ouch!

You can use the plastic part of the toner box, most have a foldable mixing bowl.
I’m using a disposable plastic plate or mixing colors recently on a porcelain plate.

WHITE HIGHLIGHTS
If you want to leave parts on your painting WHITE you can leave white the paper with the help of
masking fluid
Rubbery Liquid – Masking Liquid – We can paint parts that we want to leave white. There are many types that can be acquired:
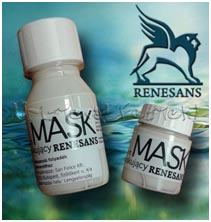
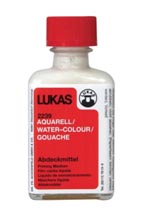
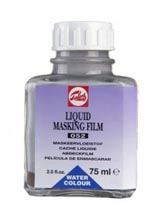
candle or wax crayon
Wherever we draw a line with a wax crayon or candle there will not catch the paint on the paper, of course, the masking liquid can be removed without residue and small shaded parts can be painted but we can not be done at the candle.
 GOUACHE
When you want to add white part over the painted surface we can use gouache. (like the little light in the eyes)
Gouache paint is similar to watercolor, however modified to make it opaque. It is similar to watercolor and tempera paint. It’s made up of a high ratio of color pigment and a solid white pigment such as chalk, plus gum arabic as a binding agent. Simply imagine as “watercolor, plus chalk.” That does oversimplify things a bit, but it gets the basic understanding.
Gouache has a lovely, heavy, velvety texture that absorbs light rather than reflecting it, creating a very smooth appearance. This makes it ideal for opaque coverage. In fact, gouache is sometimes referred to as “opaque watercolor.”
 ACRYL
ACRYL
Hope nobody kill me, that I think you can make that little dot in the eyes even with acryl white paint .
 GEL PEN
For thin lines and little dots use may use gel pen.

Tools what are usuful for painting, some makes cool textures:
- sponge,
- tooth brush,
- splashing bottle,
- salt,
- washing liquid,
- alcohol,
- hypo,
- paper towel,
- hair-dryer,
- pencil, rubber,
- straw,
- folpack,
- credit card,
- sprig,
- candle
- gauze etc.

I’ve been using them for years
: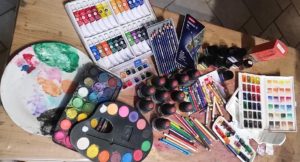
– paints and pencils:
traditional watercolour – White Nights, Schmincke (pans)
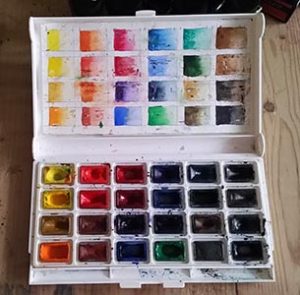
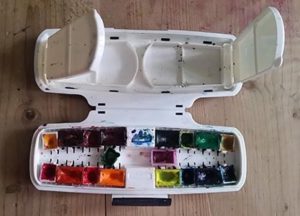
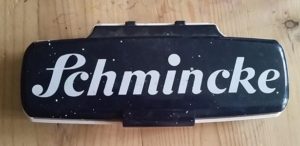
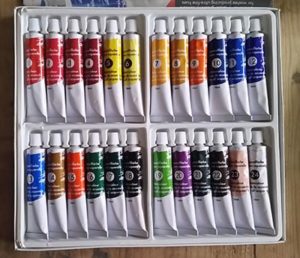
cheap tubes from supermarket (can be a great start to try watercolour)
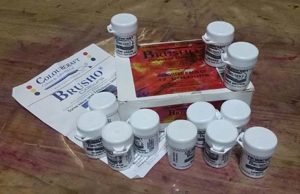
powder paints: Brusho watercolour powder (a hole must be drilled on the toop and sprinkled)
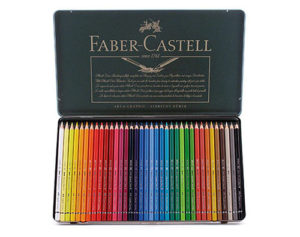
aquarelle pencil – Faber Castel-albreth Dürer
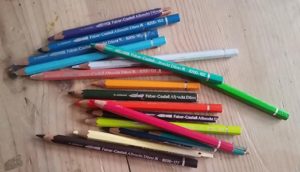
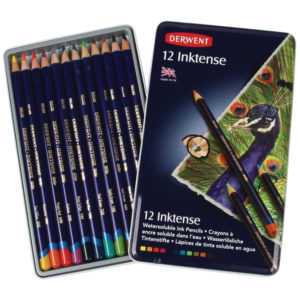
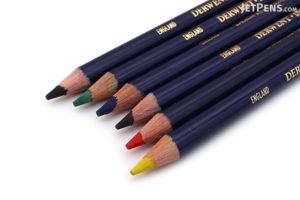
with Inktense pencil you can draw onto silk.


This little video is not part of our course but I wanted to share that you can use inktense pencil not only on paper but on fabric as well. I’m not expert in this technic but I can share how it is easy to create a wonderful painting on silk..
supplies I use:
- silk ( you can use any Natural Fabrics! Cotton, Silk, Bamboo not for synthetic fabric)
- Derwent Inktense pencil
- I mix water + small amount of decoupage glue (or use textile medium eg. Liquitex Fabric Medium) (no need to heat)
PENCIL
Derwent Inktense pencils, have ink in the lead and will be permanent once dry. They have gorgerous vibrant colour with water.
FABRIC:
Fiber type, content, and thread count of the fabric used is important. Use only fabrics made from natural fibers. The finer the fabric, the finer the line you will make on the fabric. Obviously a t-shirt will hold a finer line than a heavy cotton canvas will. Derwent Inktense pencils work very well on 100% cotton fabrics, including cotton canvas. I would always recommend testing the media on whatever textile item you choose to use if it’s new to you. Also, be aware that the color of the fabric will influence the brightness of the Inktense colors. I would recommend white or off-white as a fabric color. Most textile items advertised for dying could also be used for this technique.
MEDIUM
Use of mediums: Inktense colors are absolutely brilliant when activated. On paper, one uses water to activate the color. Water is not a good medium for activation on fabric as it bleeds into the fabric very easily. Needs other more controllable activation mediums.
Basically, the Inktense pencils are only “fixed” to the surface once they are sealed with a liquid. Also, if you really want to see what the big deal is about why the colors are so intense, you won’t get the sense of that until you actually mix them with a liquid.
You could do this with plain water, but if you’re working on fabric or some really porous paper, you know that the fibers will tend to wick the liquid along with the color. And that’s fine if it’s the effect you are going for, but if you want your color to stay where you put it, you need something different than water.
As I make a painting and I put into frame I will not wash it. But if you want to make T.shirt or other useful fabric you may use medium what need to be heat set.
for example:
Textile mediums like Winson and Newton, Liquitex, Golden and other brands are available for use
Clear Aloe Vera gel – there are many manufacturers of Aloe Vera gel. You need one without colorant and 100% Aloe Vera. It is brushed on and acts as a wet medium to activate the color. It is very controllable. You must, however, be careful to use it sparingly also. If you have puddles of it, when it dries, it can flake off with the color.
The mentioned medium should be heat set. The Aloe Vera gel should be washed out after it is heat set. The acrylic textile medium will, depending on how viscous the medium is, slightly change the hand of the fabric. You may use the fabric medium as you can control the color blending a bit more dependably.
HOW I MADE THIS LITTLE SUNFLOWER:
THIS IS A DRY ON DRY METHOD which means I draw with dry pencil on dry surface.similarly to coloring with a colored pencil.
(there are other two methos as well:
- WET on DRY (wet the pencil head and draw on dry surface)
- WET or DRY on WET (wet the fabric prior to applying either dry or wet color with a brush and then apply the color with a brush into the medium, allowing for nice blends.)
1, First put a piece of silk over a thick paper (aquarelle is great)
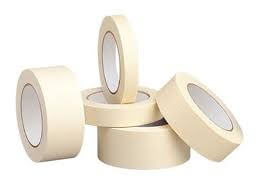
2, Stick the sides with painters tape just not to move during you colour or paint.
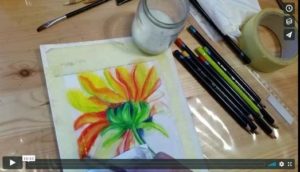
3, Draw the outline, color it with inktense pencil and then go through with watered brush.
You may try ithis technik as it is a quick painting method.
If you want to go deeper how to use inktence on fabrik I suggest to read manufacturers suggestions as well.
In 2004 I made this early video about it, phone in my left hand making the video, drawing with the other jand 🙂 , just to see how easy.

Here are my new ‘sweeeetheeeaaarrttss” bought for me as Xmas present, I cherish and hug them for a few month but when I started to use them, wow, they are gorgerous
1, the professional french brand SENNELIER
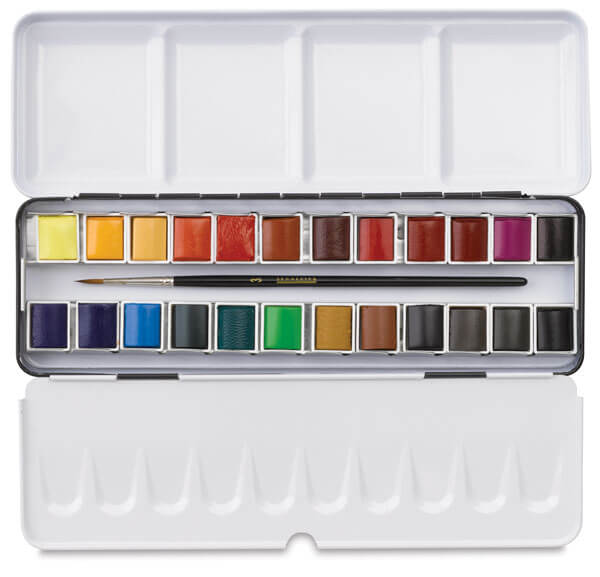
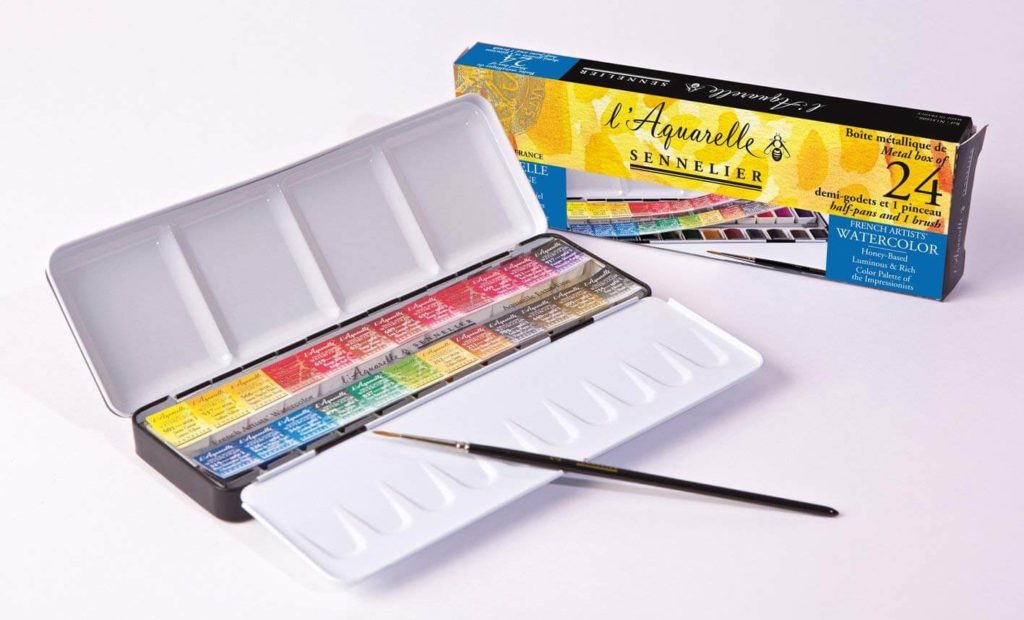
The colour sample is already in it 🙂
2, Paul Rubens aquarelle, with irridescent colours, gorgerous
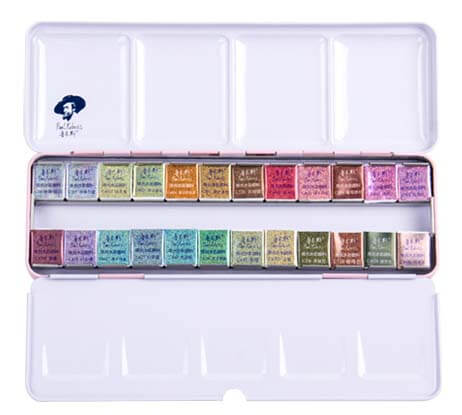
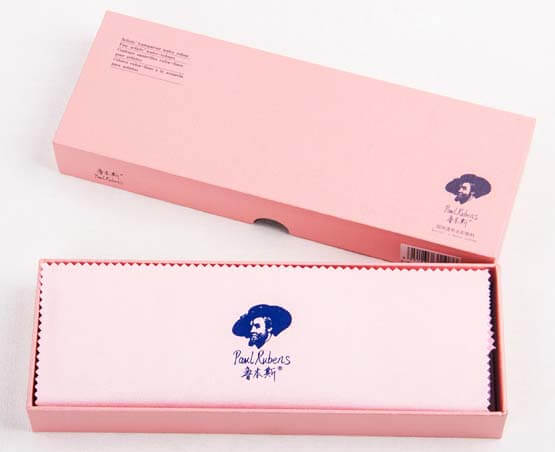
There is an empty printed chart you only have to paint your chart
3, Derwent INKTENSE PAINT PAN travel set (now there are 2 different sets)
The speciality that when it dries, it is not dissolve on paper.
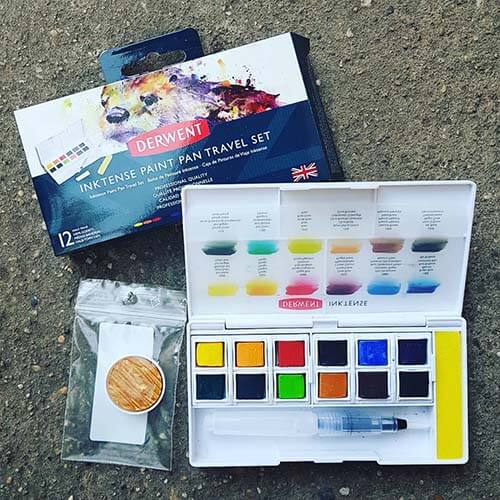
And the round GOLD paint is Finetec Pearlcolors , ideal for calligraphy and special effects.
Strong and greatly cover.
Paper:
- I use paper in sheets but min 300g / m2 or thicker 450g is better if you use more water
- I love Hahnemühle Aquarell block , my fav is 30x30cm (11,8’x11,8′).
The block is good because its side is glued so you don’t need to stretch the paper.
- Aquarelle book
Strathmore Watercolor Hardbound 22,8×27,9cm
24 page, 300g/m2 acid-free paper.
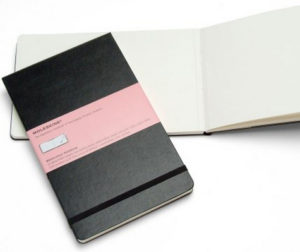
- Moleskine aquarell block ordered on bookdepository in Europe
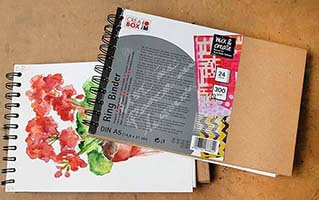
- Ring Binder 21×15 cm A5 smooth paper for mixed media technic from supermarket Lidl
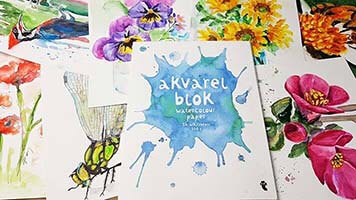
- Aquarelle Block 18×24 Aquarelle block from Flying Tiger (silly shop)
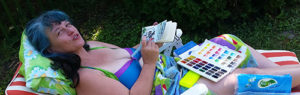
In summer, I organized a camp for children at Lake Balaton 🙂 Moleskine is good for this, so we can paint boats comfortably in the shade or in the harbor!

Comment:
There are two types of watercolor: one is pure or classic watercolor, the other is GOUACHE or topcoat, which is prepared by adding white pigment to the same type of paint and thus becoming opaque. The technique of gouache painting is similar to the technique of oil or acrylic painting, as the light paint can get over the dark.
We can also use tempera diluted with aquarelle effect. (The acrylic can also be diluted, but does not dissolve after drying)
The main feature of these paints is that if the paint reaches the water again after drying, the paint will dissolve again and the image may be ruined (or even repaired).
I said it was the hardest thing to work with aquarell, because it’s almost impossible to fix where an ‘accident’ hits the picture, but the mixing of colors and the happy accidents are wonderful. Repainting overlapping defective parts should not be with aquarell.
It is noticeable that after drying, the color is not as vivid as it is wet, this should be icalculated into the final result. Sometimes you need to paint another layer.
When working with an aquarell pencil, it is as if using a normal colored pencil to make the picture, then paint it over with water. Sometimes it is easier to make tiny details with a pencil although this is contradicted by Anna Mason’s wonderful creations. She makes brilliant detailed rich paintings with a very thin brush and a lot of patience.
I think I will never do that kind of paintings because I don’t have the time or the patience, but I really like the way she paints her pictures. Anyway I like better when aquarelle is flow. I love better the photo instead of photorealistic painting. I need some ‘blickfang’ in a painting 🙂

COUPLE OF NOTES: oil, acryl
We can paint with oil and acrylic paints on canvas or laminated, or even fibreboard, after proper priming. We need to go through these materials with a primer so that the paint does not suck into the wood, just stay on the surface. You can buy stretched canvas, they are already grounded, but you can make your own just read about it well. They are now available in a lot of sizes, so you don’t have to deal with it, just like the old painters.
The advantage of oil paint is that it dries more slowly and can be repainted after drying so that errors can be corrected later. Oil paints are color-like, so they show the same shade as wet after drying.
Acrylic paints can also be diluted with water, but no longer dissolve in water after drying.
Other additives are available for both acrylic paints and oil, so we can make any shades or effects what you dream of. Such useful additives include polishing, matting, diluent, drying accelerator, drying retardant or topcoat etc.
What should be the topic? What material do we use?
If we chose the technique and what we paint, we can start with it. After choosing the theme, it is worth making a sketch, so if we continue with the work later from our memory, it will help to continue. You can make a sketch on a completely separate sheet, or you can sketch on your canvas.
Mixing colors can be done on a palette, or on the canvas too.
Signing and placement
SIGN
Signature:
In acrylic and aquarelle I use the same color as I use in the painting.
I try to edit it into the painting. (part of the painting)
Not too big, not too small.
Try to find yours – you will be recognizable
(on oil painting in the wet-on-wet technic I use kemper wipe out tool instead of paint)
FRAME
The artwork on the paper, the watercolors, the pastel, should be framed as soon as possible to place the glass or plexiglass in front of the paper. The glass protects it from dust
Here in Hungary but I think everywhere to get a beautiful frame to our paintings from the frameshop where they create especially for the picture is very ecpensive. Sfter painting many oil painting I decided to change the way. First I bought frames than I cutted the plywood for the exact size and paint on it.
When I bought 30x30cm aquarelle blocks I ordered almost 100 frames from a frames shop owners friend and it was resonable price for them (and looked great on exhibitions). Sometimes I buy the frames on net from people who don’t need them anymore, sometimes totally new ones for half price.
Oil and acrylic paintings can be varnished to preserve and protect your finished art piece with wax or varnish, so it is no need glass into the frame. Streched canvas images that have a thickness of 2cm or even the sides of thicker frames called 3D are usually painted on the sides too, so they do not require an extra frame.
You can carefully wipe the lacquered images with a dry cloth. They do not require any other care than dedusting.
The natural frame can be painted or marinated. The easiest and most natural effect is achieved with water-based , which are enough to pass through the frame only once. The original pattern of the tree, coming through the glaze, which is especially spectacular. In the case of painted frames, the paint completely covers the tree, so its pattern cannot be seen.
When placing an image, pay attention to the environment in which it is placed. Just like a small painting on a large wall, a large picture mounted on a small wall does not show well. It is necessary that not exposed to direct sunlight and also not good if the air is very dry or humid.
The theme of creation is also decisive. There are some pictures that we can really enjoy looking from far, but the opposite is also common when the tiny details are important for sight.
SELL
And in other hand, you have to be ready to let your paintings go.
At the beginning for a long time I haven’t sell any of my paintings as they were my babies and I was insist on them.
I was able to make a copy of my ! aquarelle ! paintings to have them after I gave them away. Crazy yeh?
Once my wonderful friend says: ‘if someone want to buy your paintings gave them as they will be happy to see them in their home- they will be the new parents” and buyers come out 🙂
I always say that every picture has its owner, it is important to fall in love with it.

If it was the first time You meet with aquarell, hope you liked this little taste of it.
If you have any question, opinion please feel free to contact me via fb group or pm message.
I would be very happy to see your painting will you upload them to the fb group?
Instagram: #natureartwithildy –hashtag your work from the course and follow hashtag to see what other students are creating! Follow ME on Insta HERE. Happy creating!